> ## Documentation Index
> Fetch the complete documentation index at: https://ai-docs.myidfi.com/llms.txt
> Use this file to discover all available pages before exploring further.
# Lead Generation
> Convert customer interactions into qualified leads with the Lead Generation integration.
With Lead Generation enabled, your AI agent can smoothly collect valuable information such as a visitor’s name, email, phone number, or a quick message directly within the conversation. There's no need for clunky forms or manual follow-ups.
It’s a simple and seamless way to ensure your agent isn’t just chatting with users, but actually capturing leads you can follow up on.
## How to Enable and Configure Lead Generation
Follow these steps to activate and customize the lead capture process:
Navigate to the Lead Generation card under the Integrations tab in your dashboard.
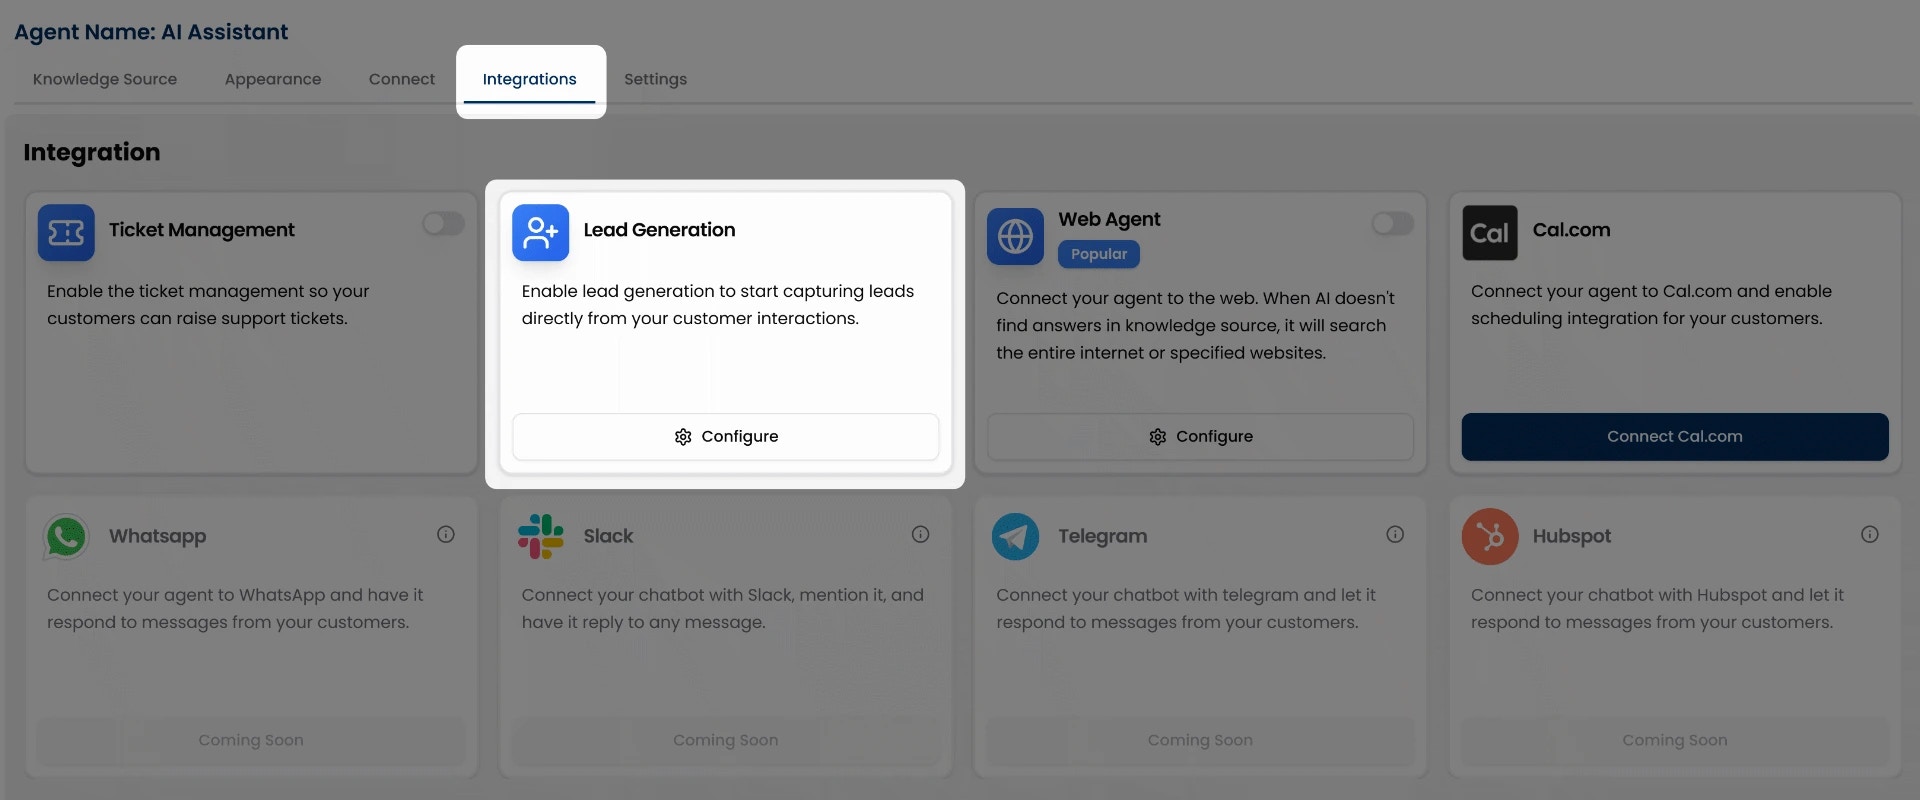 Click the **Configure** button to open the **Leads Capture Form**.
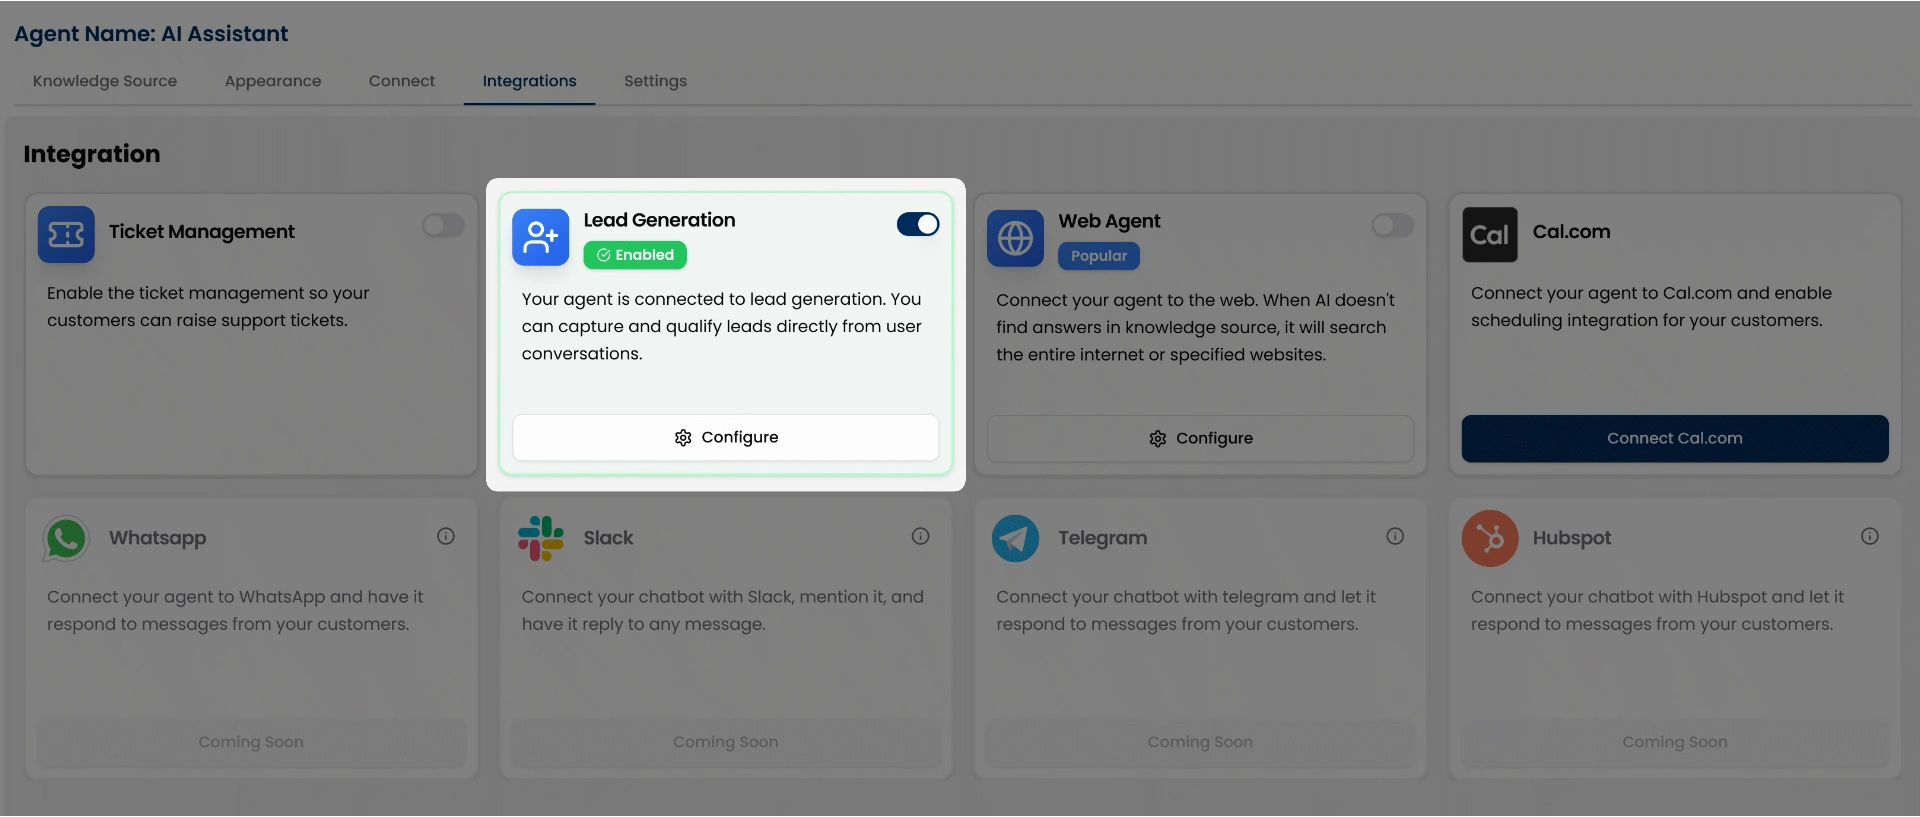
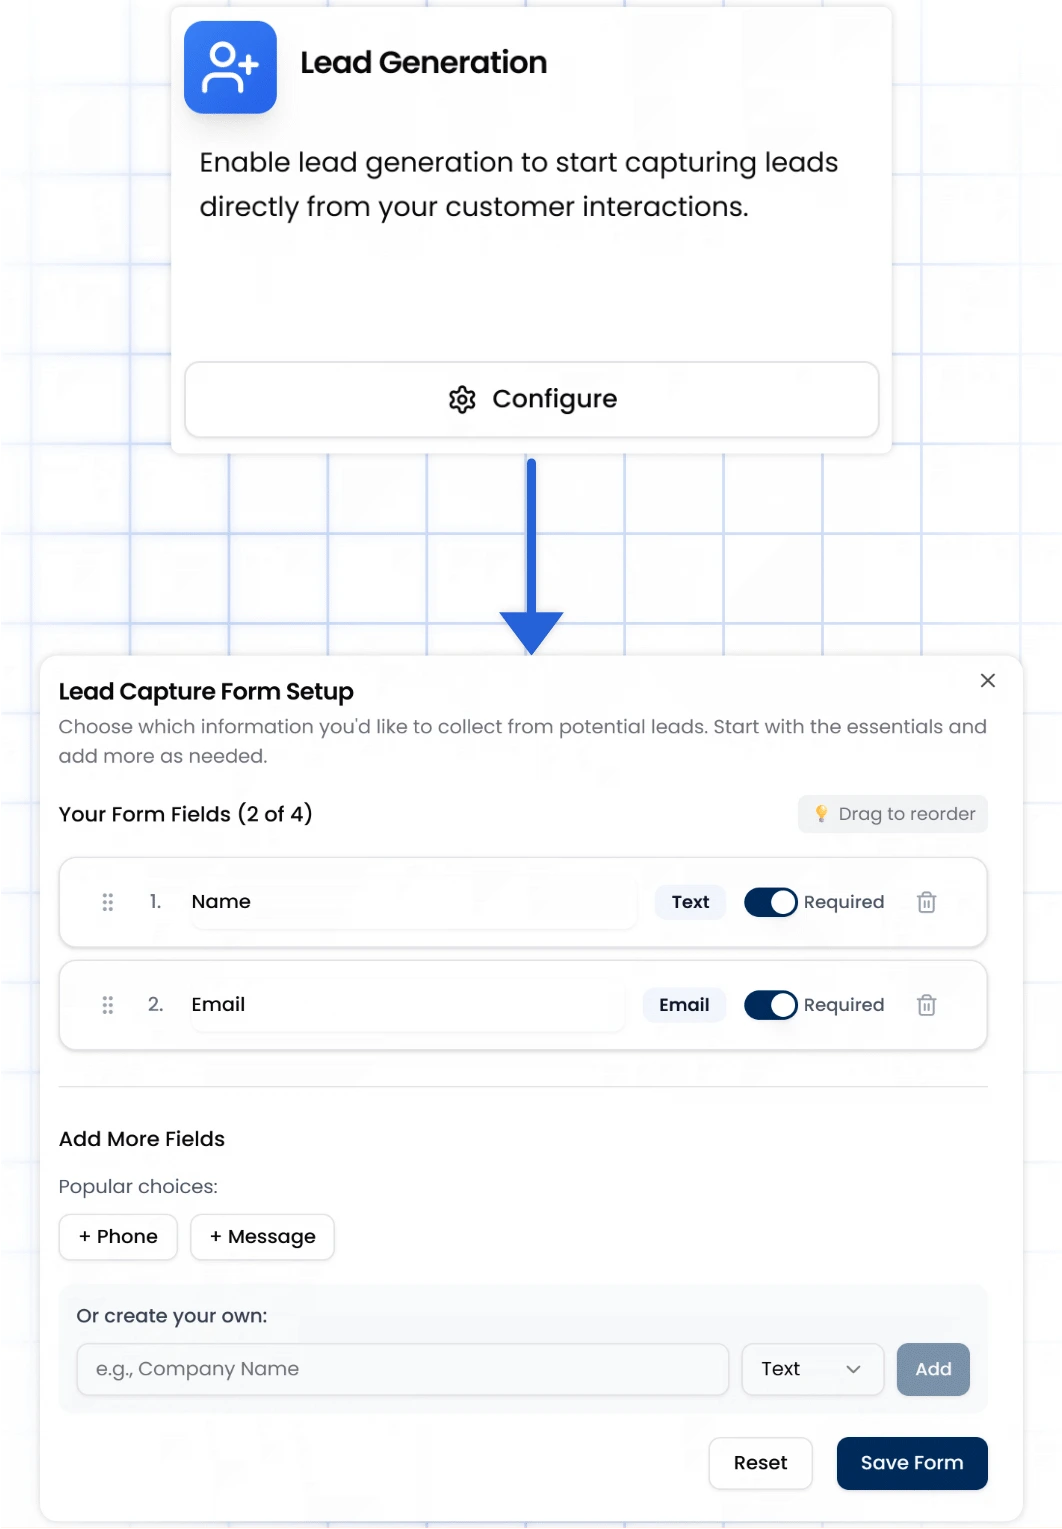 There's no toggle or activation step, configuring the form is all you need to start capturing leads.
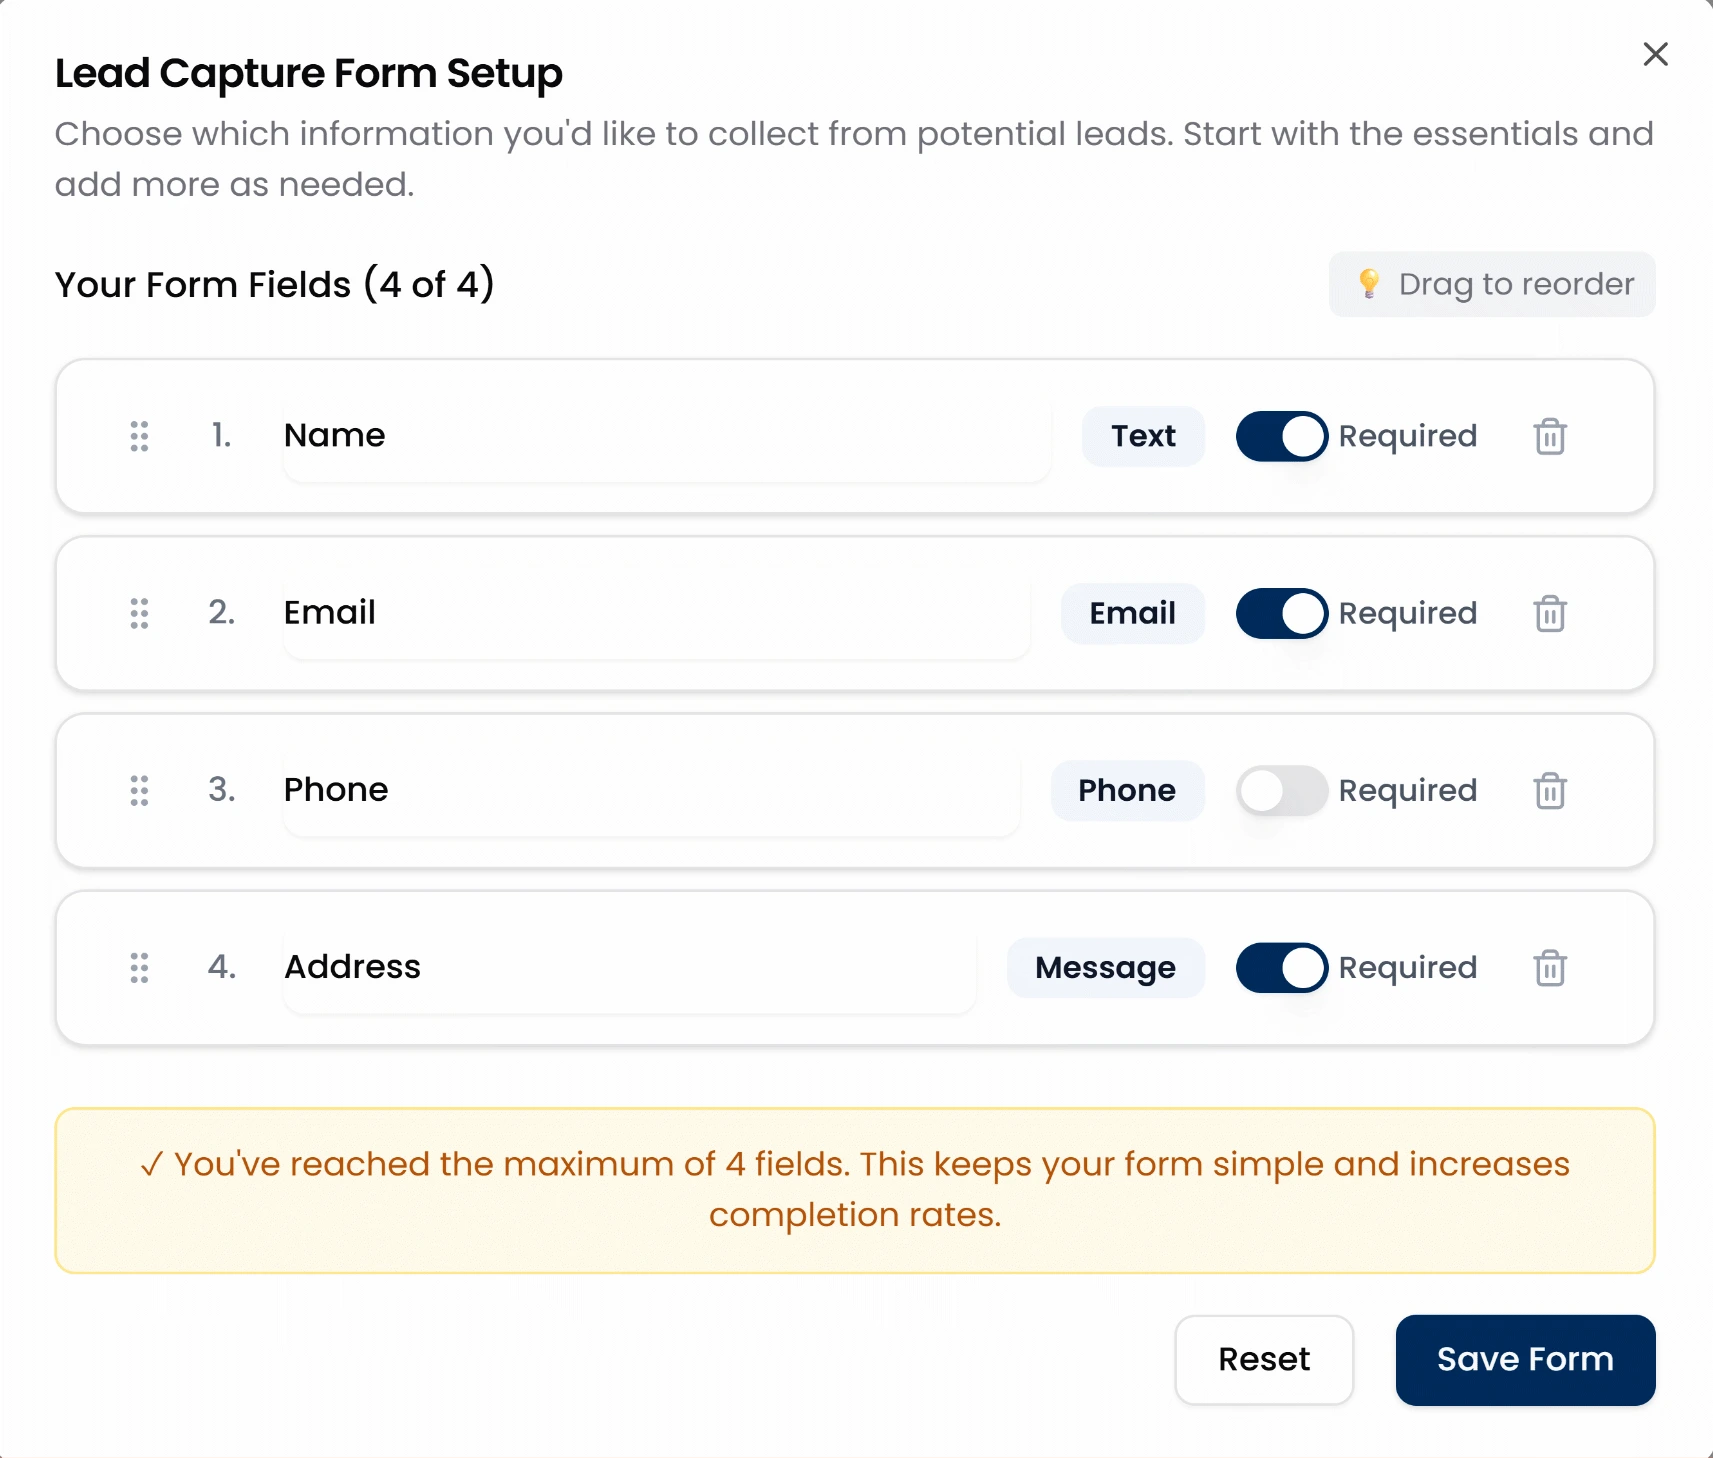 Inside the form editor, you can customize your fields:
* Choose from recommended fields: **Name, Email, Phone, Message**.
* Add up to **4 fields total**.
* Mark any field as **Required**.
* Reorder fields using **drag and drop**.
* Add custom fields by entering a label and selecting the field type (Text, Phone, Email, or Message).
To ensure smooth conversations, the form supports a maximum of 4 fields.
Once done, click **Save Form**. Your AI agent will now prompt users to fill out this form.
Inside the form editor, you can customize your fields:
* Choose from recommended fields: **Name, Email, Phone, Message**.
* Add up to **4 fields total**.
* Mark any field as **Required**.
* Reorder fields using **drag and drop**.
* Add custom fields by entering a label and selecting the field type (Text, Phone, Email, or Message).
To ensure smooth conversations, the form supports a maximum of 4 fields.
Once done, click **Save Form**. Your AI agent will now prompt users to fill out this form.
 ## Preview in Chat
Whenever a new visitor opens the chat agent, it automatically prompts a lead capture form like this, directly within the chat:
## Preview in Chat
Whenever a new visitor opens the chat agent, it automatically prompts a lead capture form like this, directly within the chat:
 ## Accessing & Managing Captured Leads
All leads captured through your chat agent are stored in the Leads section of your myIDFI AI dashboard, accessible from the left sidebar. You can review user details, contacts, and take follow-up actions from there.
Additionally, you’ll receive an email notification each time a new lead is submitted through the form.
To explore how to manage, track, and view your leads, visit the Leads section of the documentation.
## Accessing & Managing Captured Leads
All leads captured through your chat agent are stored in the Leads section of your myIDFI AI dashboard, accessible from the left sidebar. You can review user details, contacts, and take follow-up actions from there.
Additionally, you’ll receive an email notification each time a new lead is submitted through the form.
To explore how to manage, track, and view your leads, visit the Leads section of the documentation.