> ## Documentation Index
> Fetch the complete documentation index at: https://ai-docs.myidfi.com/llms.txt
> Use this file to discover all available pages before exploring further.
# Build Your First Agent
> Now that you're familiar with the myIDFI AI dashboard, it's time to create your first AI support agent.
Follow these steps to build your first **Chat Agent**:
## 1. Go to AI Agents
From the left-hand sidebar, navigate to the **AI Agents** section and click on **Create Your Mortgage Agent**.
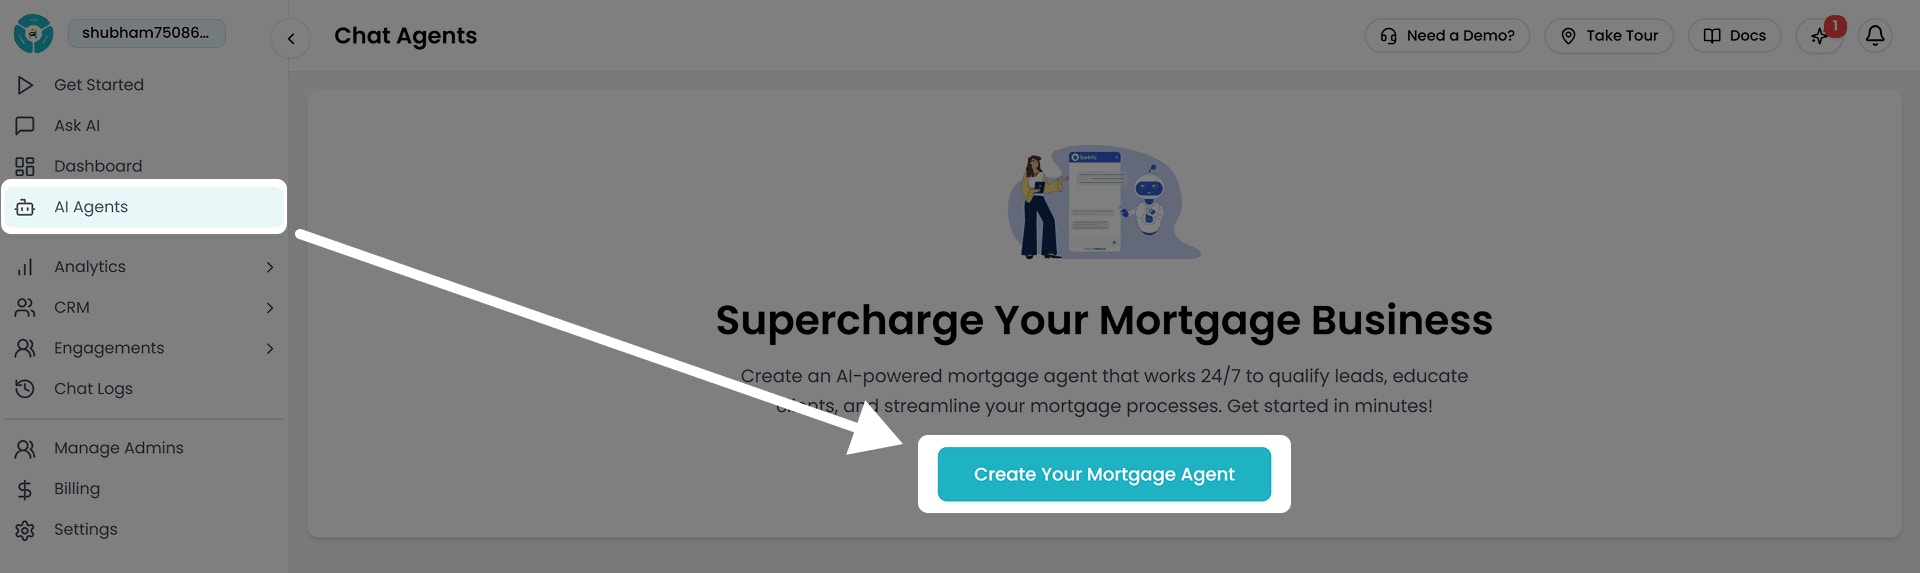 You can also manage, edit, update, or deactivate your existing chat agents from this section anytime.
## 2. Name Your Agent
Enter a simple and clear name for your agent, like **Support Agent** or **AI Assistant**. This helps keep things organized, especially if you create multiple agents later.
You can also manage, edit, update, or deactivate your existing chat agents from this section anytime.
## 2. Name Your Agent
Enter a simple and clear name for your agent, like **Support Agent** or **AI Assistant**. This helps keep things organized, especially if you create multiple agents later.
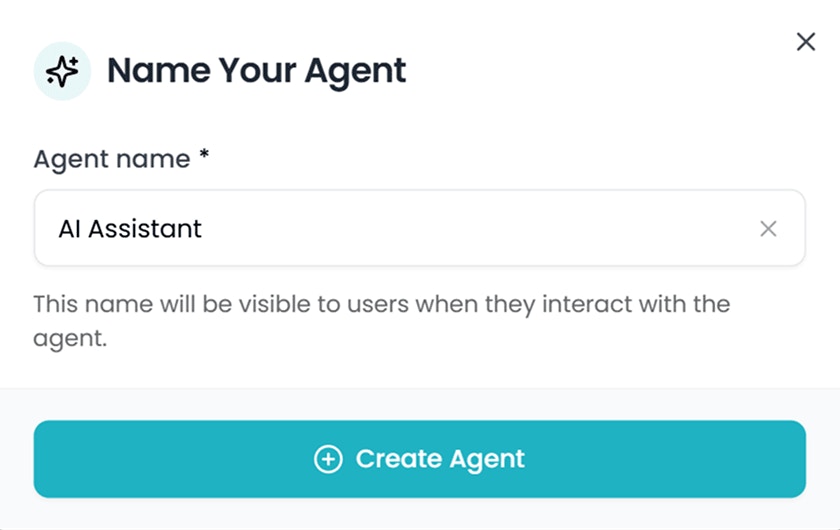 After entering a super cool name for your chat agent, click on **Create Agent** to build your agent and proceed with the setup process.
It takes just a few seconds to create one and move to the next step where you can start training it using your own data.
## 3. Upload Your Data
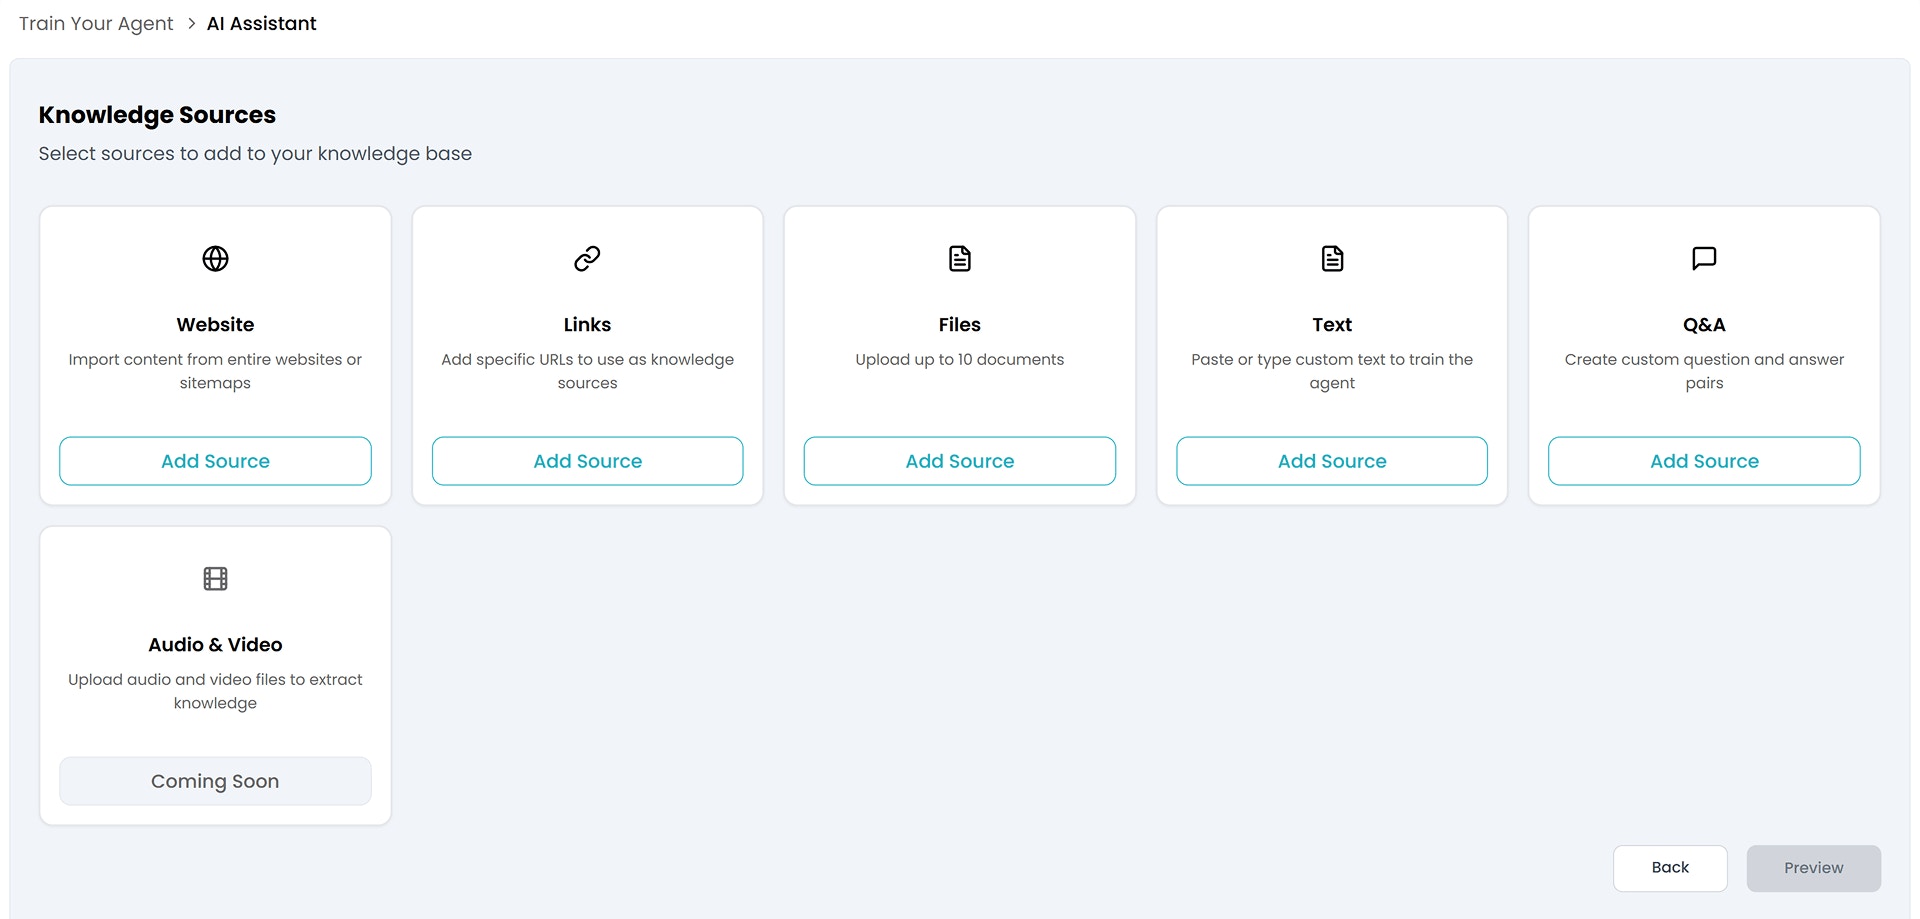
To help your AI agent respond accurately, you can train it using a variety of content sources.
Here's what you can add:
* Add your website or sitemap
* Upload files like PDFs.
* Add direct URLs to key pages or knowledge bases
* Paste text or question-answer pairs manually.
* Add videos or audio content
After entering a super cool name for your chat agent, click on **Create Agent** to build your agent and proceed with the setup process.
It takes just a few seconds to create one and move to the next step where you can start training it using your own data.
## 3. Upload Your Data
To help your AI agent respond accurately, you can train it using a variety of content sources.
Here's what you can add:
* Add your website or sitemap
* Upload files like PDFs.
* Add direct URLs to key pages or knowledge bases
* Paste text or question-answer pairs manually.
* Add videos or audio content
 #### Start with Your Website:
You can start training your chat agent by importing content directly from your website or sitemap. Just click “**Add Source**” under the **Website** option to get started.
#### Start with Your Website:
You can start training your chat agent by importing content directly from your website or sitemap. Just click “**Add Source**” under the **Website** option to get started.
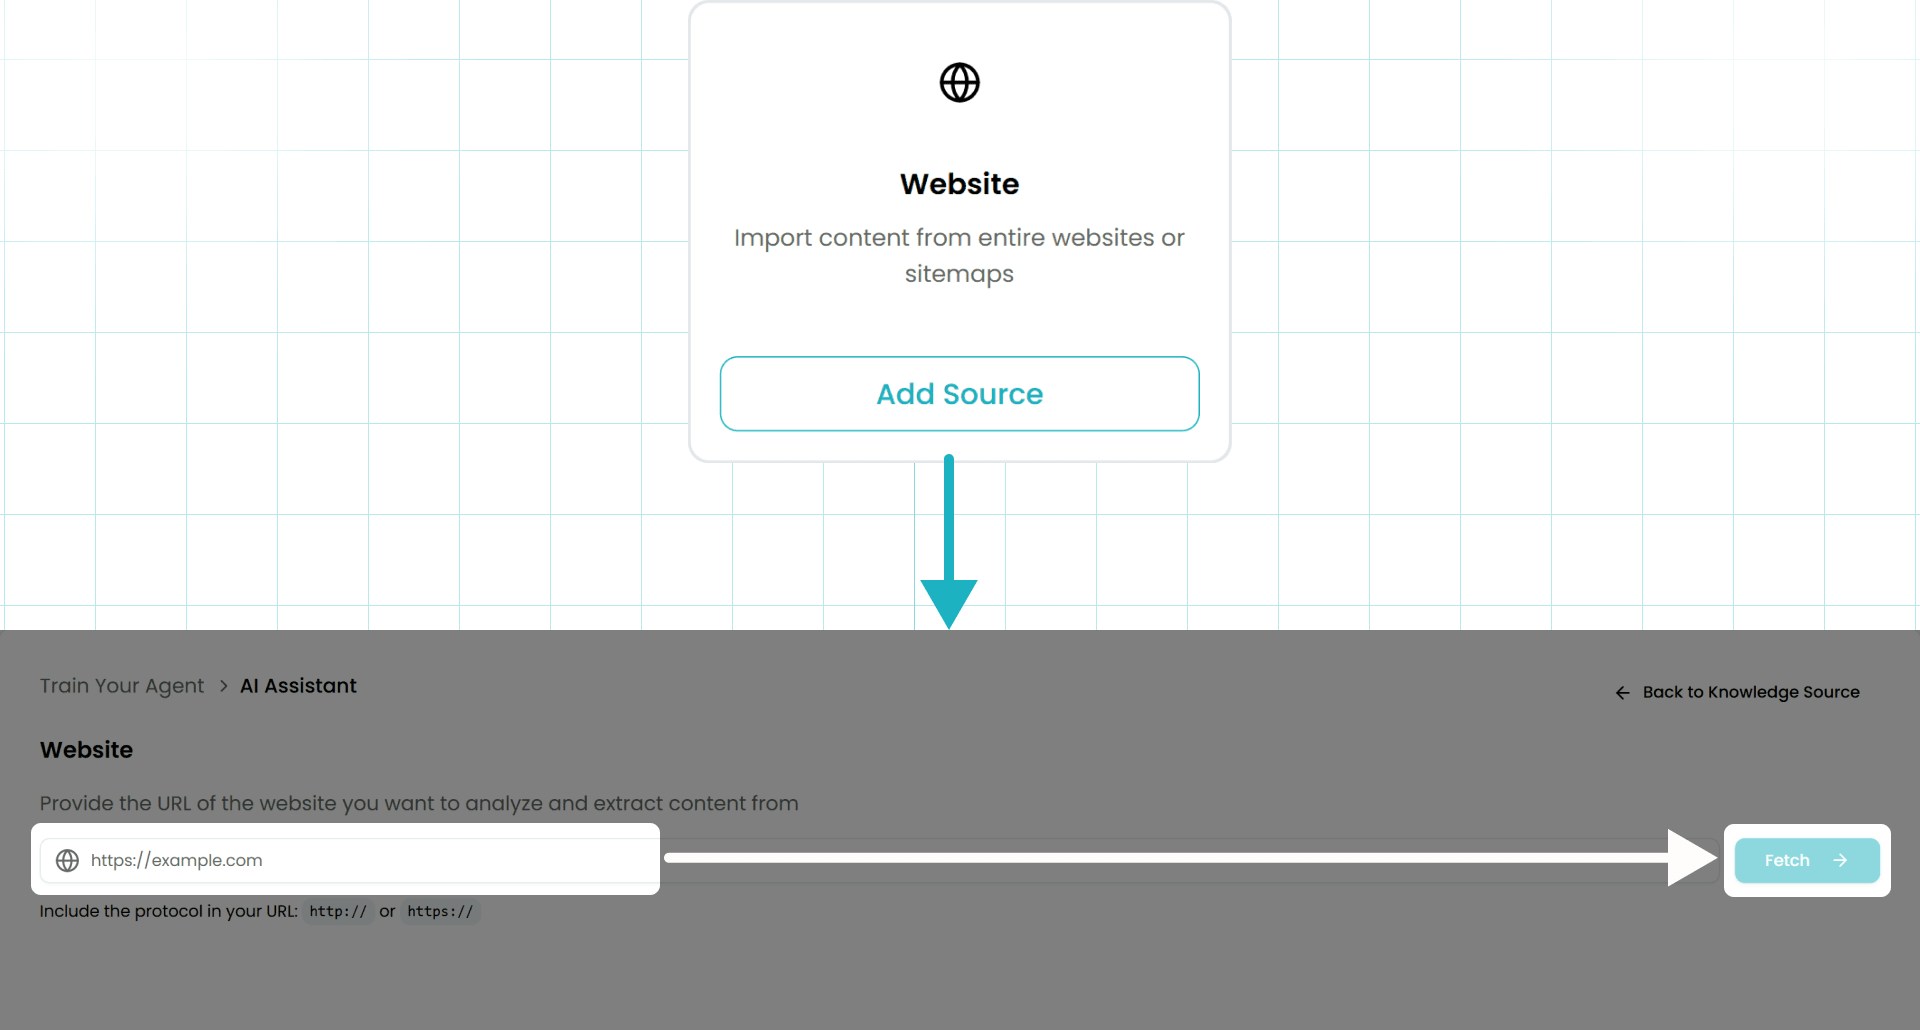 Paste your website URL and click “**Fetch**”. Our AI engine will automatically crawl your site and pull in useful content from pages like product details, services, and blogs. It’s a quick way to give your agent a solid knowledge base without manual effort.
After that, you can:
* Select specific links to use for training.
* Or click Save Links to include all of them.
Paste your website URL and click “**Fetch**”. Our AI engine will automatically crawl your site and pull in useful content from pages like product details, services, and blogs. It’s a quick way to give your agent a solid knowledge base without manual effort.
After that, you can:
* Select specific links to use for training.
* Or click Save Links to include all of them.
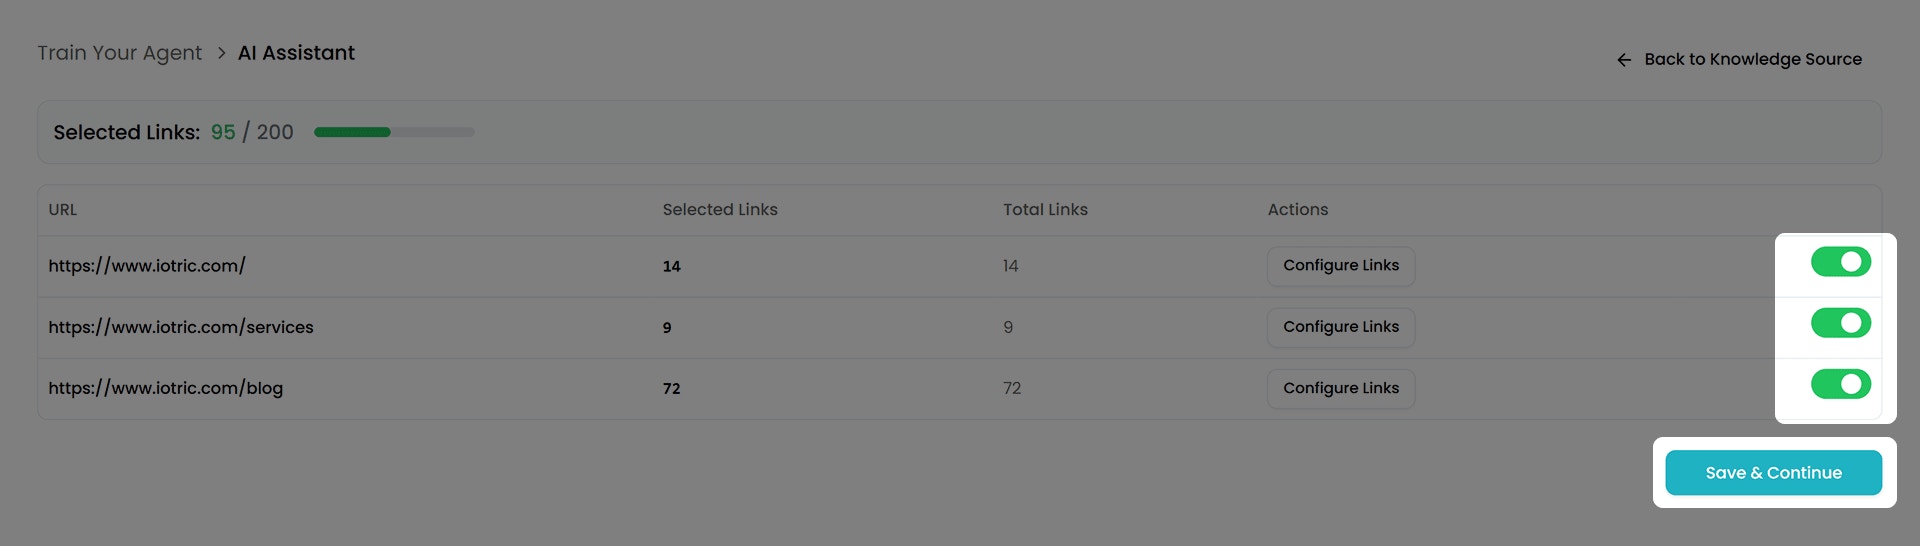 Once done, hit the **Done** button to return to the **Knowledge Sources** section.
You can also train your agent using direct links, file uploads, or plain text. We'll explore each of these methods in detail on the dedicated [Knowledge Sources](/user-guides/Knowledge_sources) page.
Once you’ve saved your website links, click the **Preview** button in the Knowledge Sources section to view all the content that will be used to train your chat agent.
Once done, hit the **Done** button to return to the **Knowledge Sources** section.
You can also train your agent using direct links, file uploads, or plain text. We'll explore each of these methods in detail on the dedicated [Knowledge Sources](/user-guides/Knowledge_sources) page.
Once you’ve saved your website links, click the **Preview** button in the Knowledge Sources section to view all the content that will be used to train your chat agent.
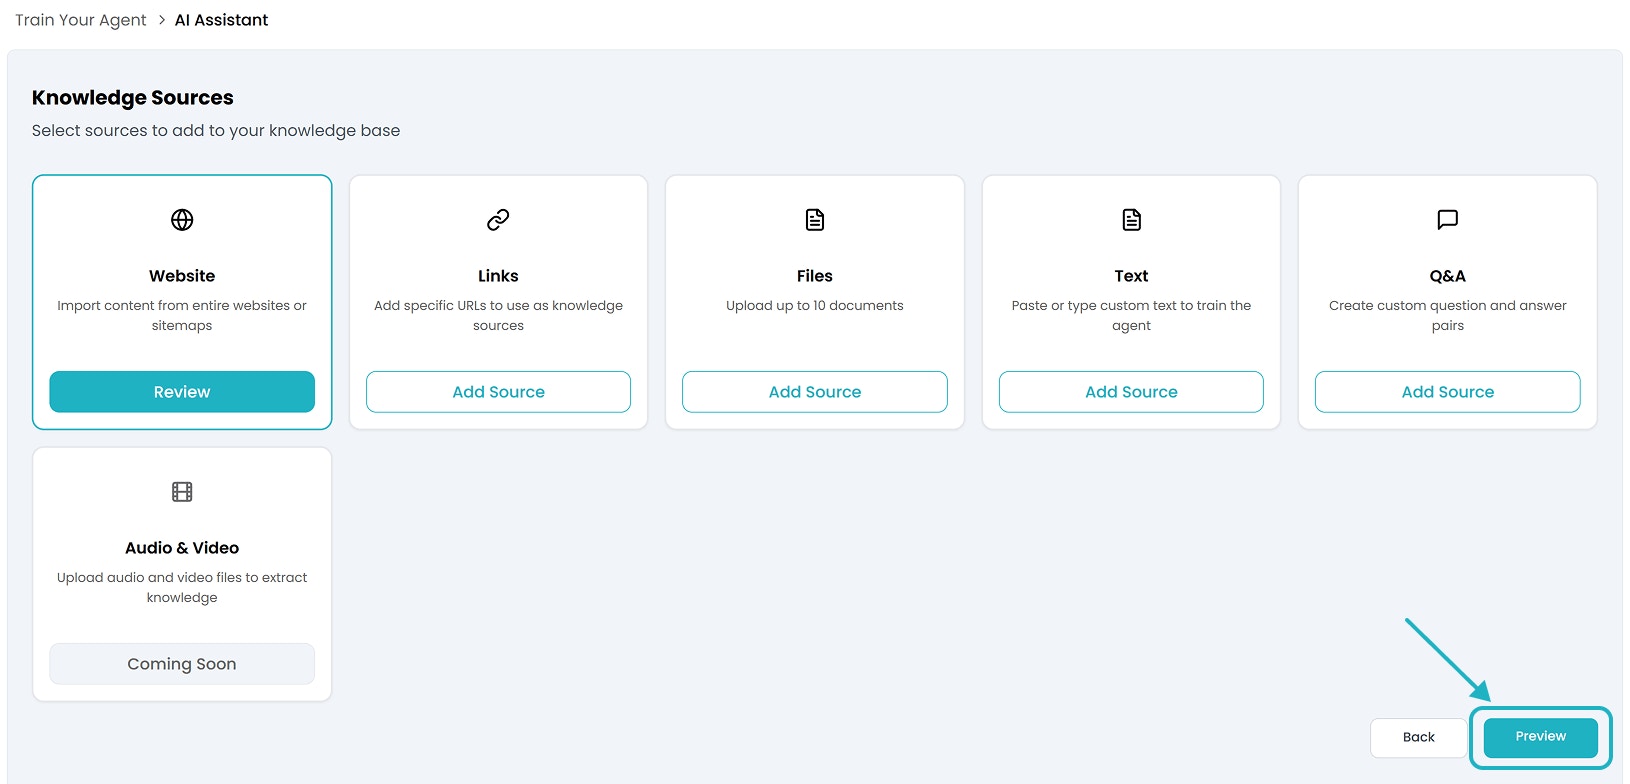 After reviewing your saved data, click “**Create My Agent!**” to start training your chat agent using your own content. You’ll then move on to the **Appearance** section.
## 4. Customize Your Agent
In the **Appearance** section, you’ll get a **Preview URL** where you can test your chat agent live.
After reviewing your saved data, click “**Create My Agent!**” to start training your chat agent using your own content. You’ll then move on to the **Appearance** section.
## 4. Customize Your Agent
In the **Appearance** section, you’ll get a **Preview URL** where you can test your chat agent live.
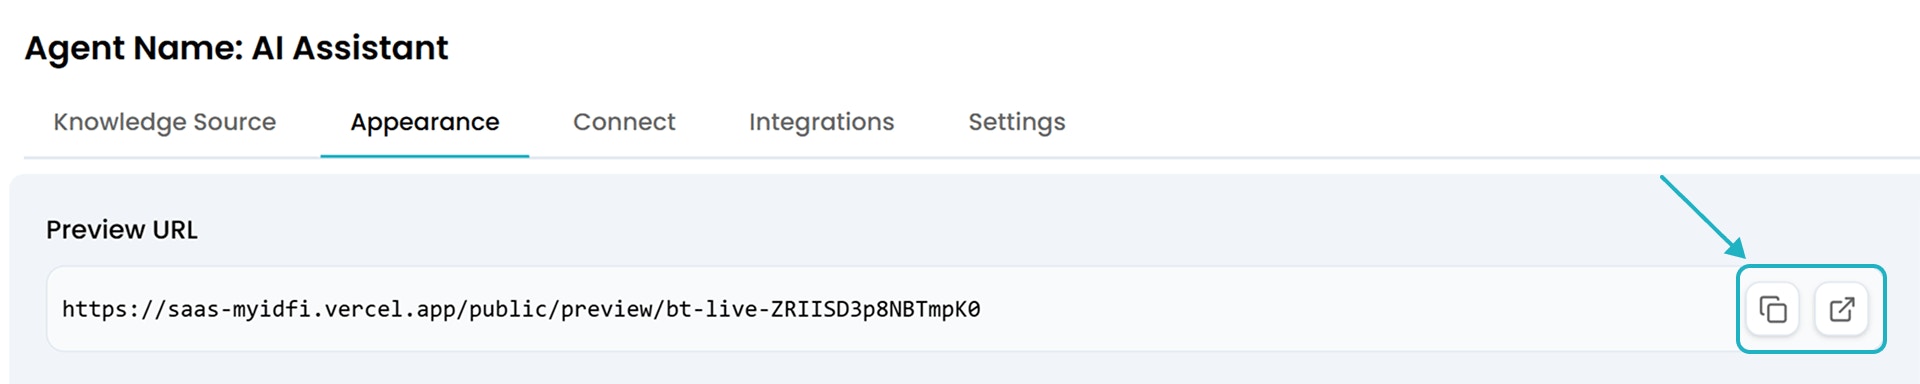 Copy and open this URL in a browser tab to interact with your agent.
You’ll also find several settings to customize the look and feel of your agent, making sure it aligns perfectly with your brand identity.
You can upload your logo, set the preferred language, update the agent’s name, choose a primary color, and switch between light and dark themes.
Copy and open this URL in a browser tab to interact with your agent.
You’ll also find several settings to customize the look and feel of your agent, making sure it aligns perfectly with your brand identity.
You can upload your logo, set the preferred language, update the agent’s name, choose a primary color, and switch between light and dark themes.
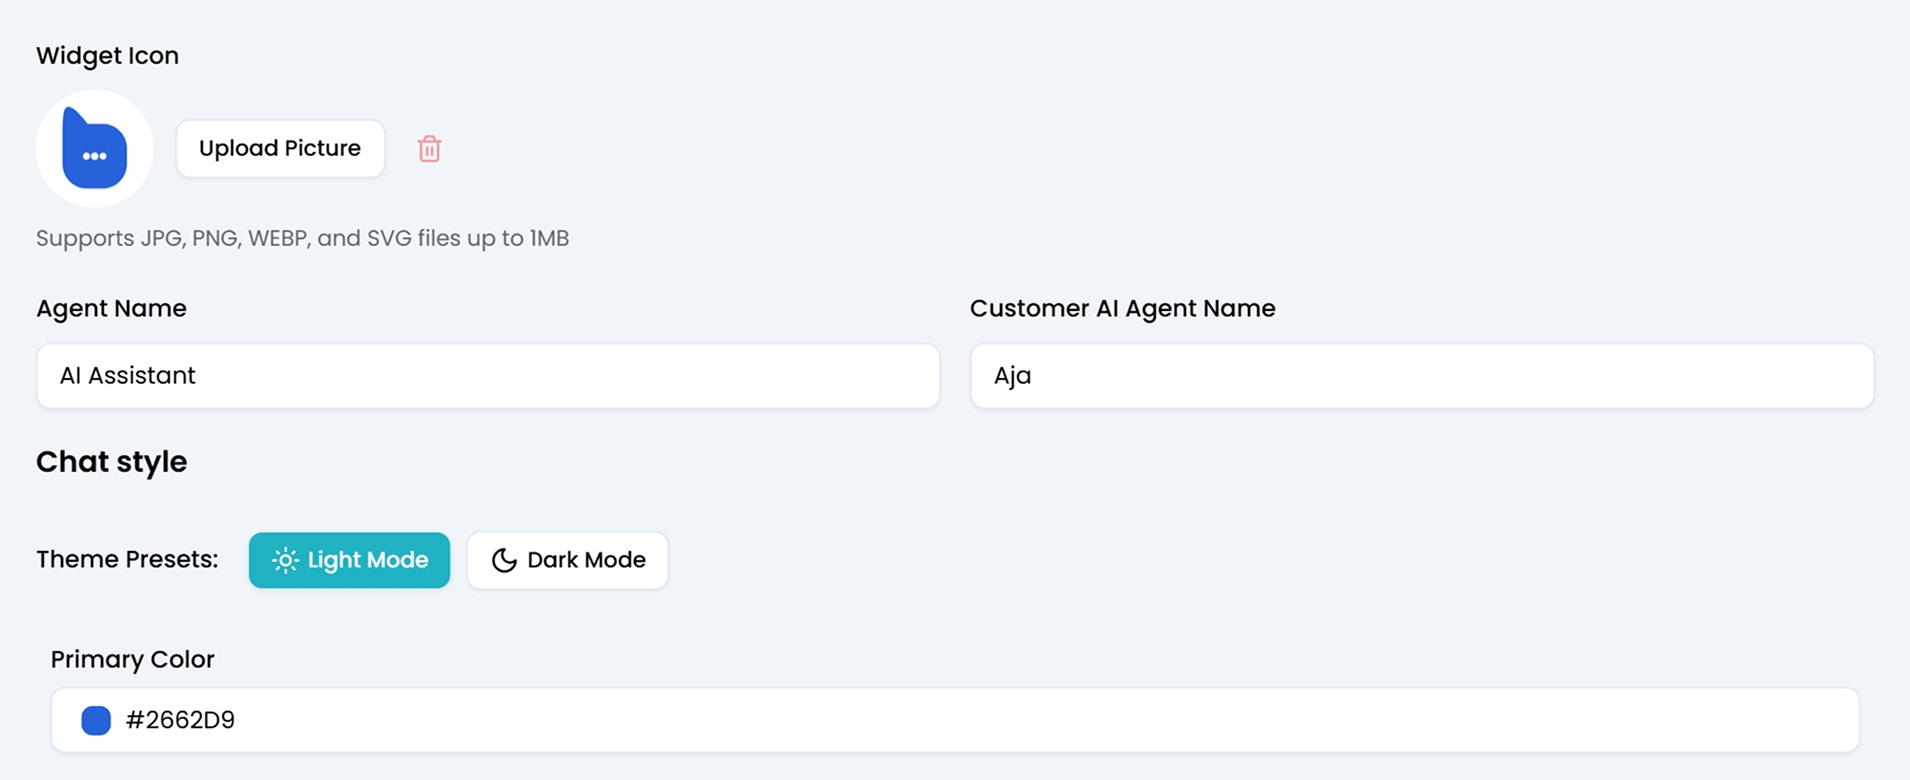 We’ll cover all these customization options in detail in the **Appearance** section of this documentation.
## 5. Deploy Your Agent
Once you're satisfied with how your chat agent performs, you can easily integrate it into your website using either of the two methods available under the **Connect** tab in the myIDFI AI dashboard:
We’ll cover all these customization options in detail in the **Appearance** section of this documentation.
## 5. Deploy Your Agent
Once you're satisfied with how your chat agent performs, you can easily integrate it into your website using either of the two methods available under the **Connect** tab in the myIDFI AI dashboard:
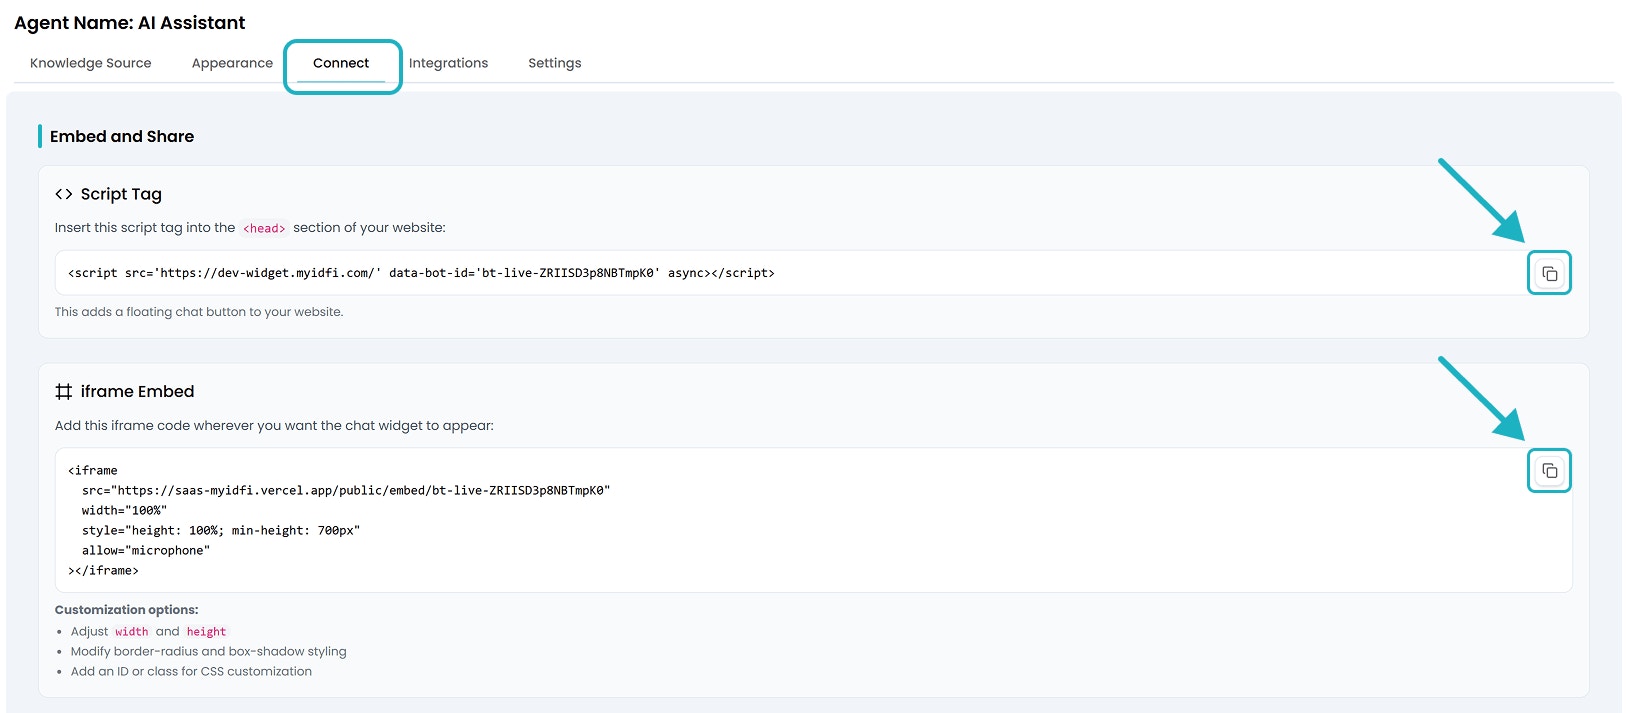 #### 1. Script Tag (Floating Chat Bubble)
This adds a floating chat bubble to your website.
* Simply copy the provided `
#### 1. Script Tag (Floating Chat Bubble)
This adds a floating chat bubble to your website.
* Simply copy the provided `